5. Content
Protect pages & articles
With DigiMember you can protect your pages and articles that are on the same installation as DigiMember is installed on. No external pages and no custom posts can be protected with DigiMember.
To protect a page or an article you must first create a product. You can then assign the pages and articles to be protected to the respective product created.
There are 2 possibilities to assign pages & articles to a product:
- protect contents by Drag & Drop
- protect content via editor (pages & articles)
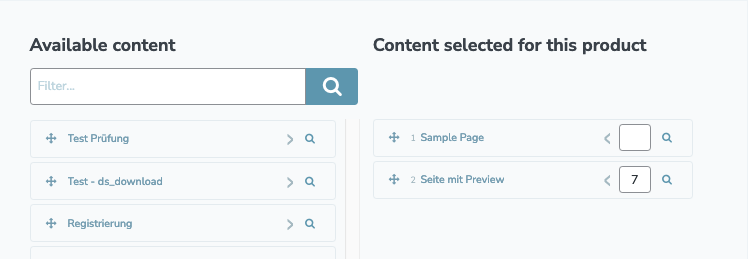
Protect contents (drag & drop)
To assign contents (pages & articles) to a product via drag & drop, click on "Contents" in the DigiMember menu. Now select the product you want to add pages or articles to from the drop-down menu above.

Then select the "Pages" (Standard) or "Posts" tab at the top of the page.
Now all available contents (pages or posts) that you have created are displayed. To the right of it you will see an empty field.
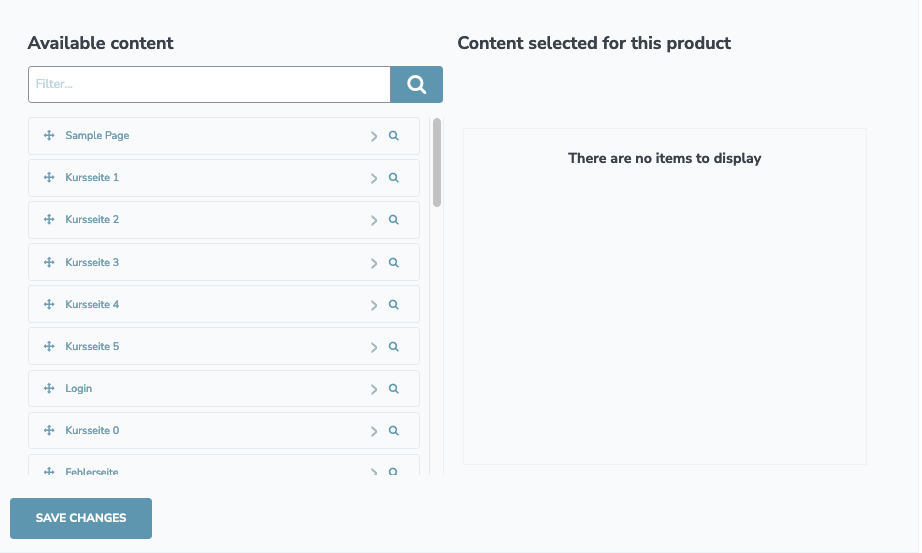
Click on the desired content (page or post) with the left mouse button and keep the button pressed. Now drag the content (with the mouse button pressed down) to the right into the field (Drag & Drop).
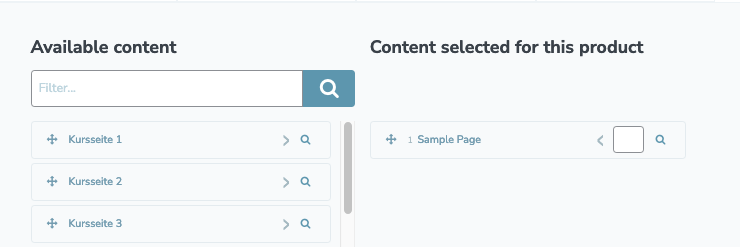
To release the corresponding content for users at a later date, enter the value for the day of release in the field at the end (e.g. "7" for one week after registration/purchase). The respective purchase or registration date of the member is decisive here.
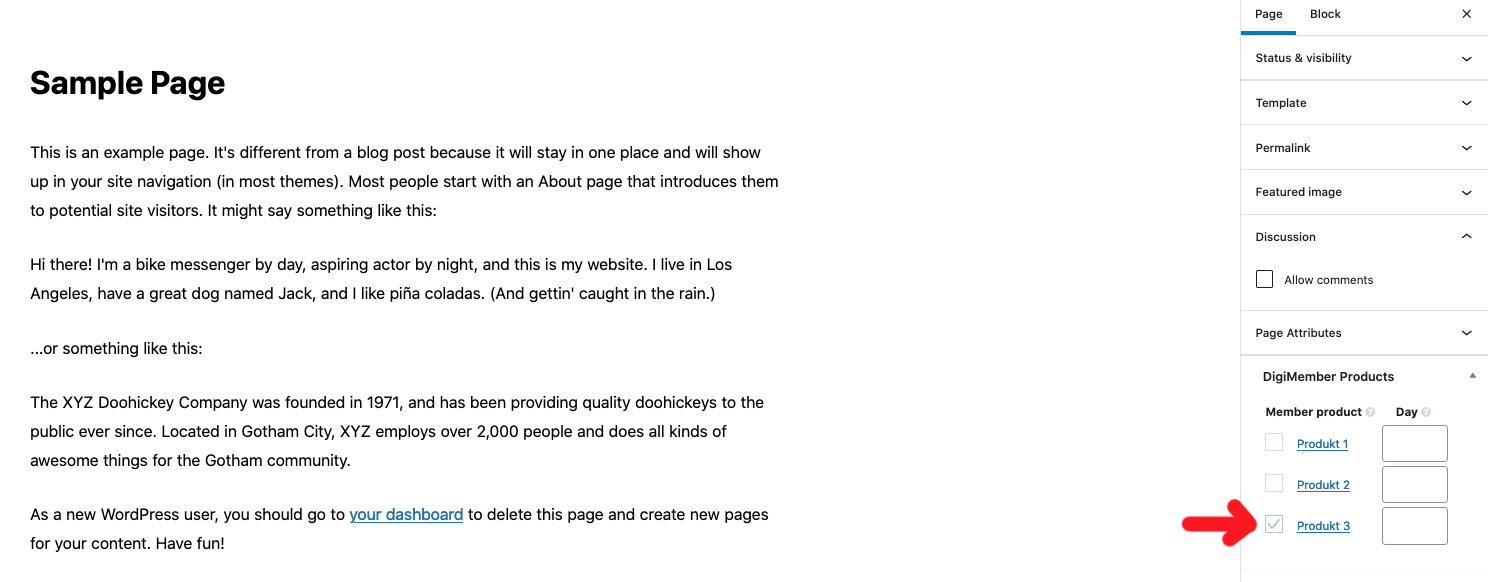
Protect contents (Editor)
You can protect your content (pages & articles) directly during creation. Create a new page or article. In the editor, in the right sidebar you will find the box "Products". There your already created products are listed. By activating the checkbox in front of the respective product, you can assign the respective content to the product. Analogous to Assignment by Drag & Drop you can enter the day of the release of the content behind the product (e.g. "7" for one week after registration / purchase).