11. Exam certificates
In this video we explain how to create exams and exam certificates and how to combine them.
summary:
- Log in to your WordPress Dashboard and click on DigiMember -> Examinations
- Click on "Add".
- Give your exam a name and create questions and their possible answers.
- Then click on "Accept change".
- Customize the texts in the tab "Texts" according to your own ideas and then click on "Apply changes".
- In the tab "Settings" you can now set how many percent correct answers are required to pass the exam and how often the exam can be repeated.
- Then click "Apply change" again to save.
- Create a new page and add the exam shortcode to the page.
- Go now to DigiMember -> Exam Certificates and click "Add ".
- Select the design of your certificate and click "Select".
- Give the certificate a name and choose which exam you want to associate with this certificate. Then you can adapt your certificate and design it individually with text and upload a seal if you want to.
- Then you have to insert the shortcode for the "Download certificate" button on any page where the participant can download the certificate if he or she has passed the exam.
- Done.
After each exam, you can automatically issue the user with an exam certificate in digital form. DigiMember generates a corresponding PDF file based on predefined criteria and data, which the user can download to his computer after passing the exam.
To create a new exam certificate, click on "Exam Certificates" in the DigiMember menu. Then click on "add" above.

In the next step, you select a template that suits you best from five different certificate templates and click on "select":

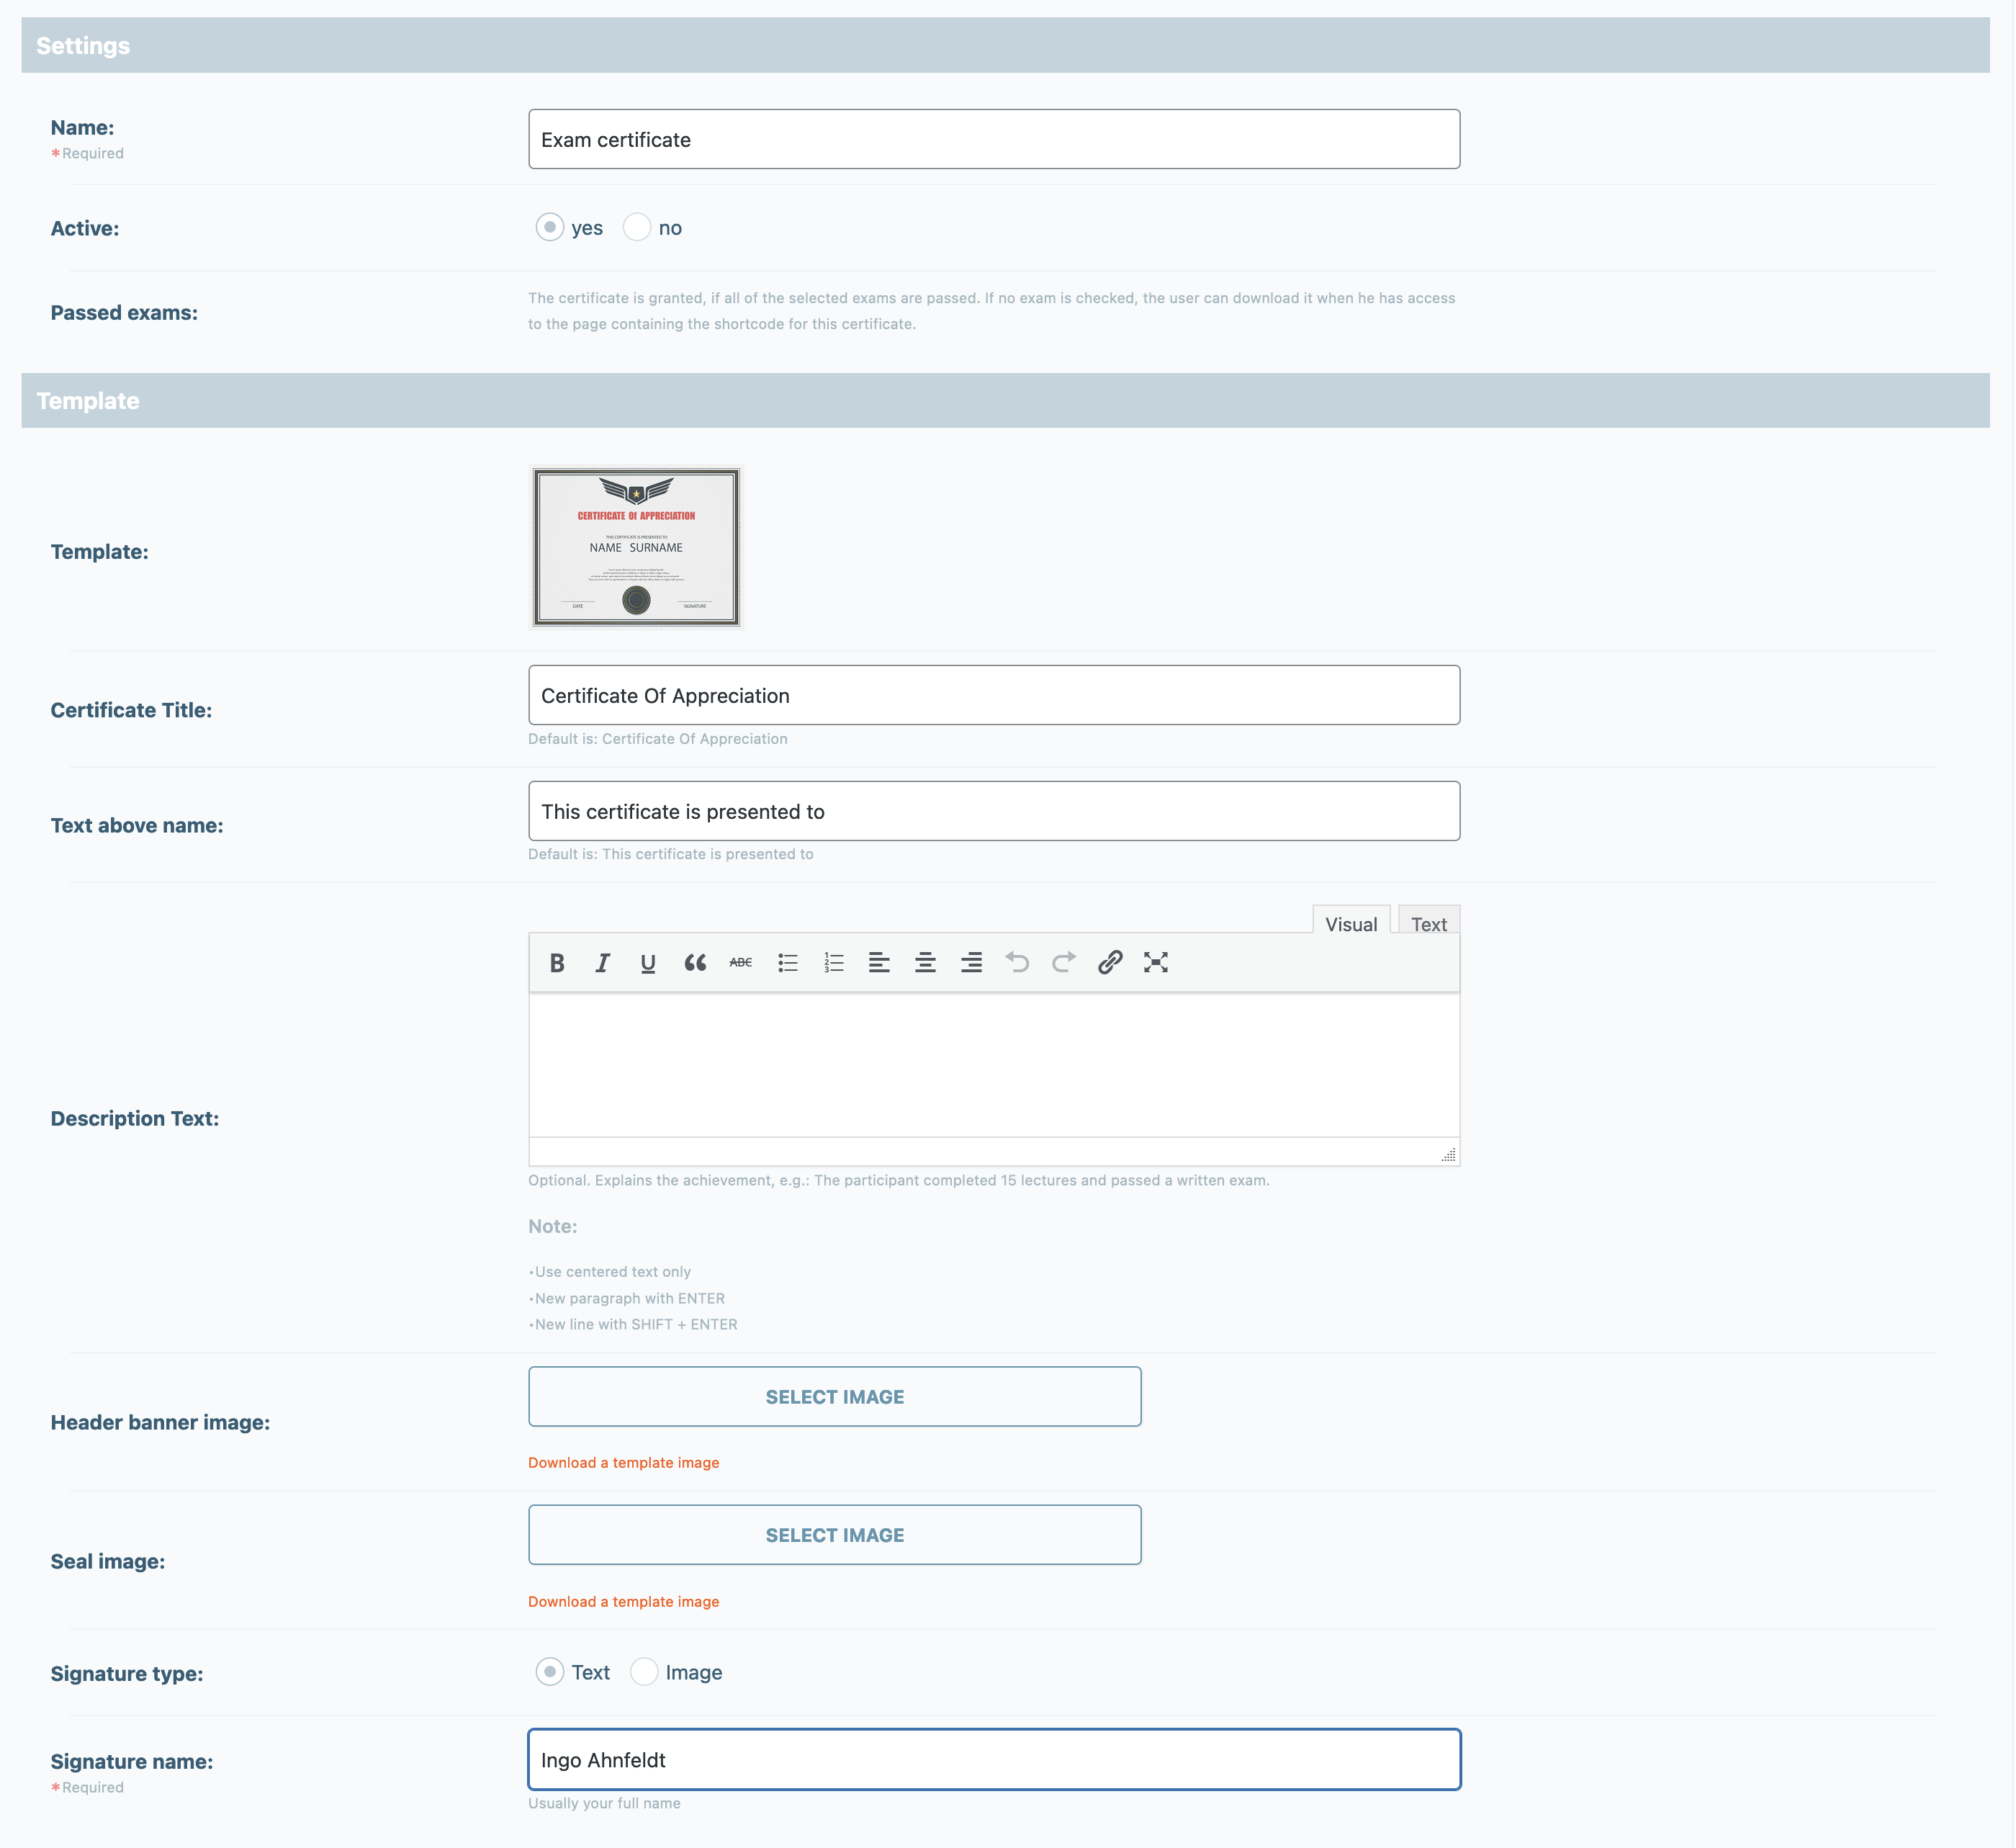
Under Settings, name the certificate and select the exam for which it should be issued (if successfully passed)
The certificate is awarded when the user has passed all the selected tests. If no exam is selected, the certificate will be issued if the user has access to the WordPress page with the download short code.

Under "Template" you define the certificate title, the text above the users name and the exam description (e.g. what user has learned).
You can also use your own banner logo or download the existing image and adapt it yourself.
You can also download and adapt the seal image and then upload it again. Alternatively, you can upload your own seal image.
As signature you can either upload your own signature (saved in image form) or simply note your name and it will appear in a nice font on the certificate.

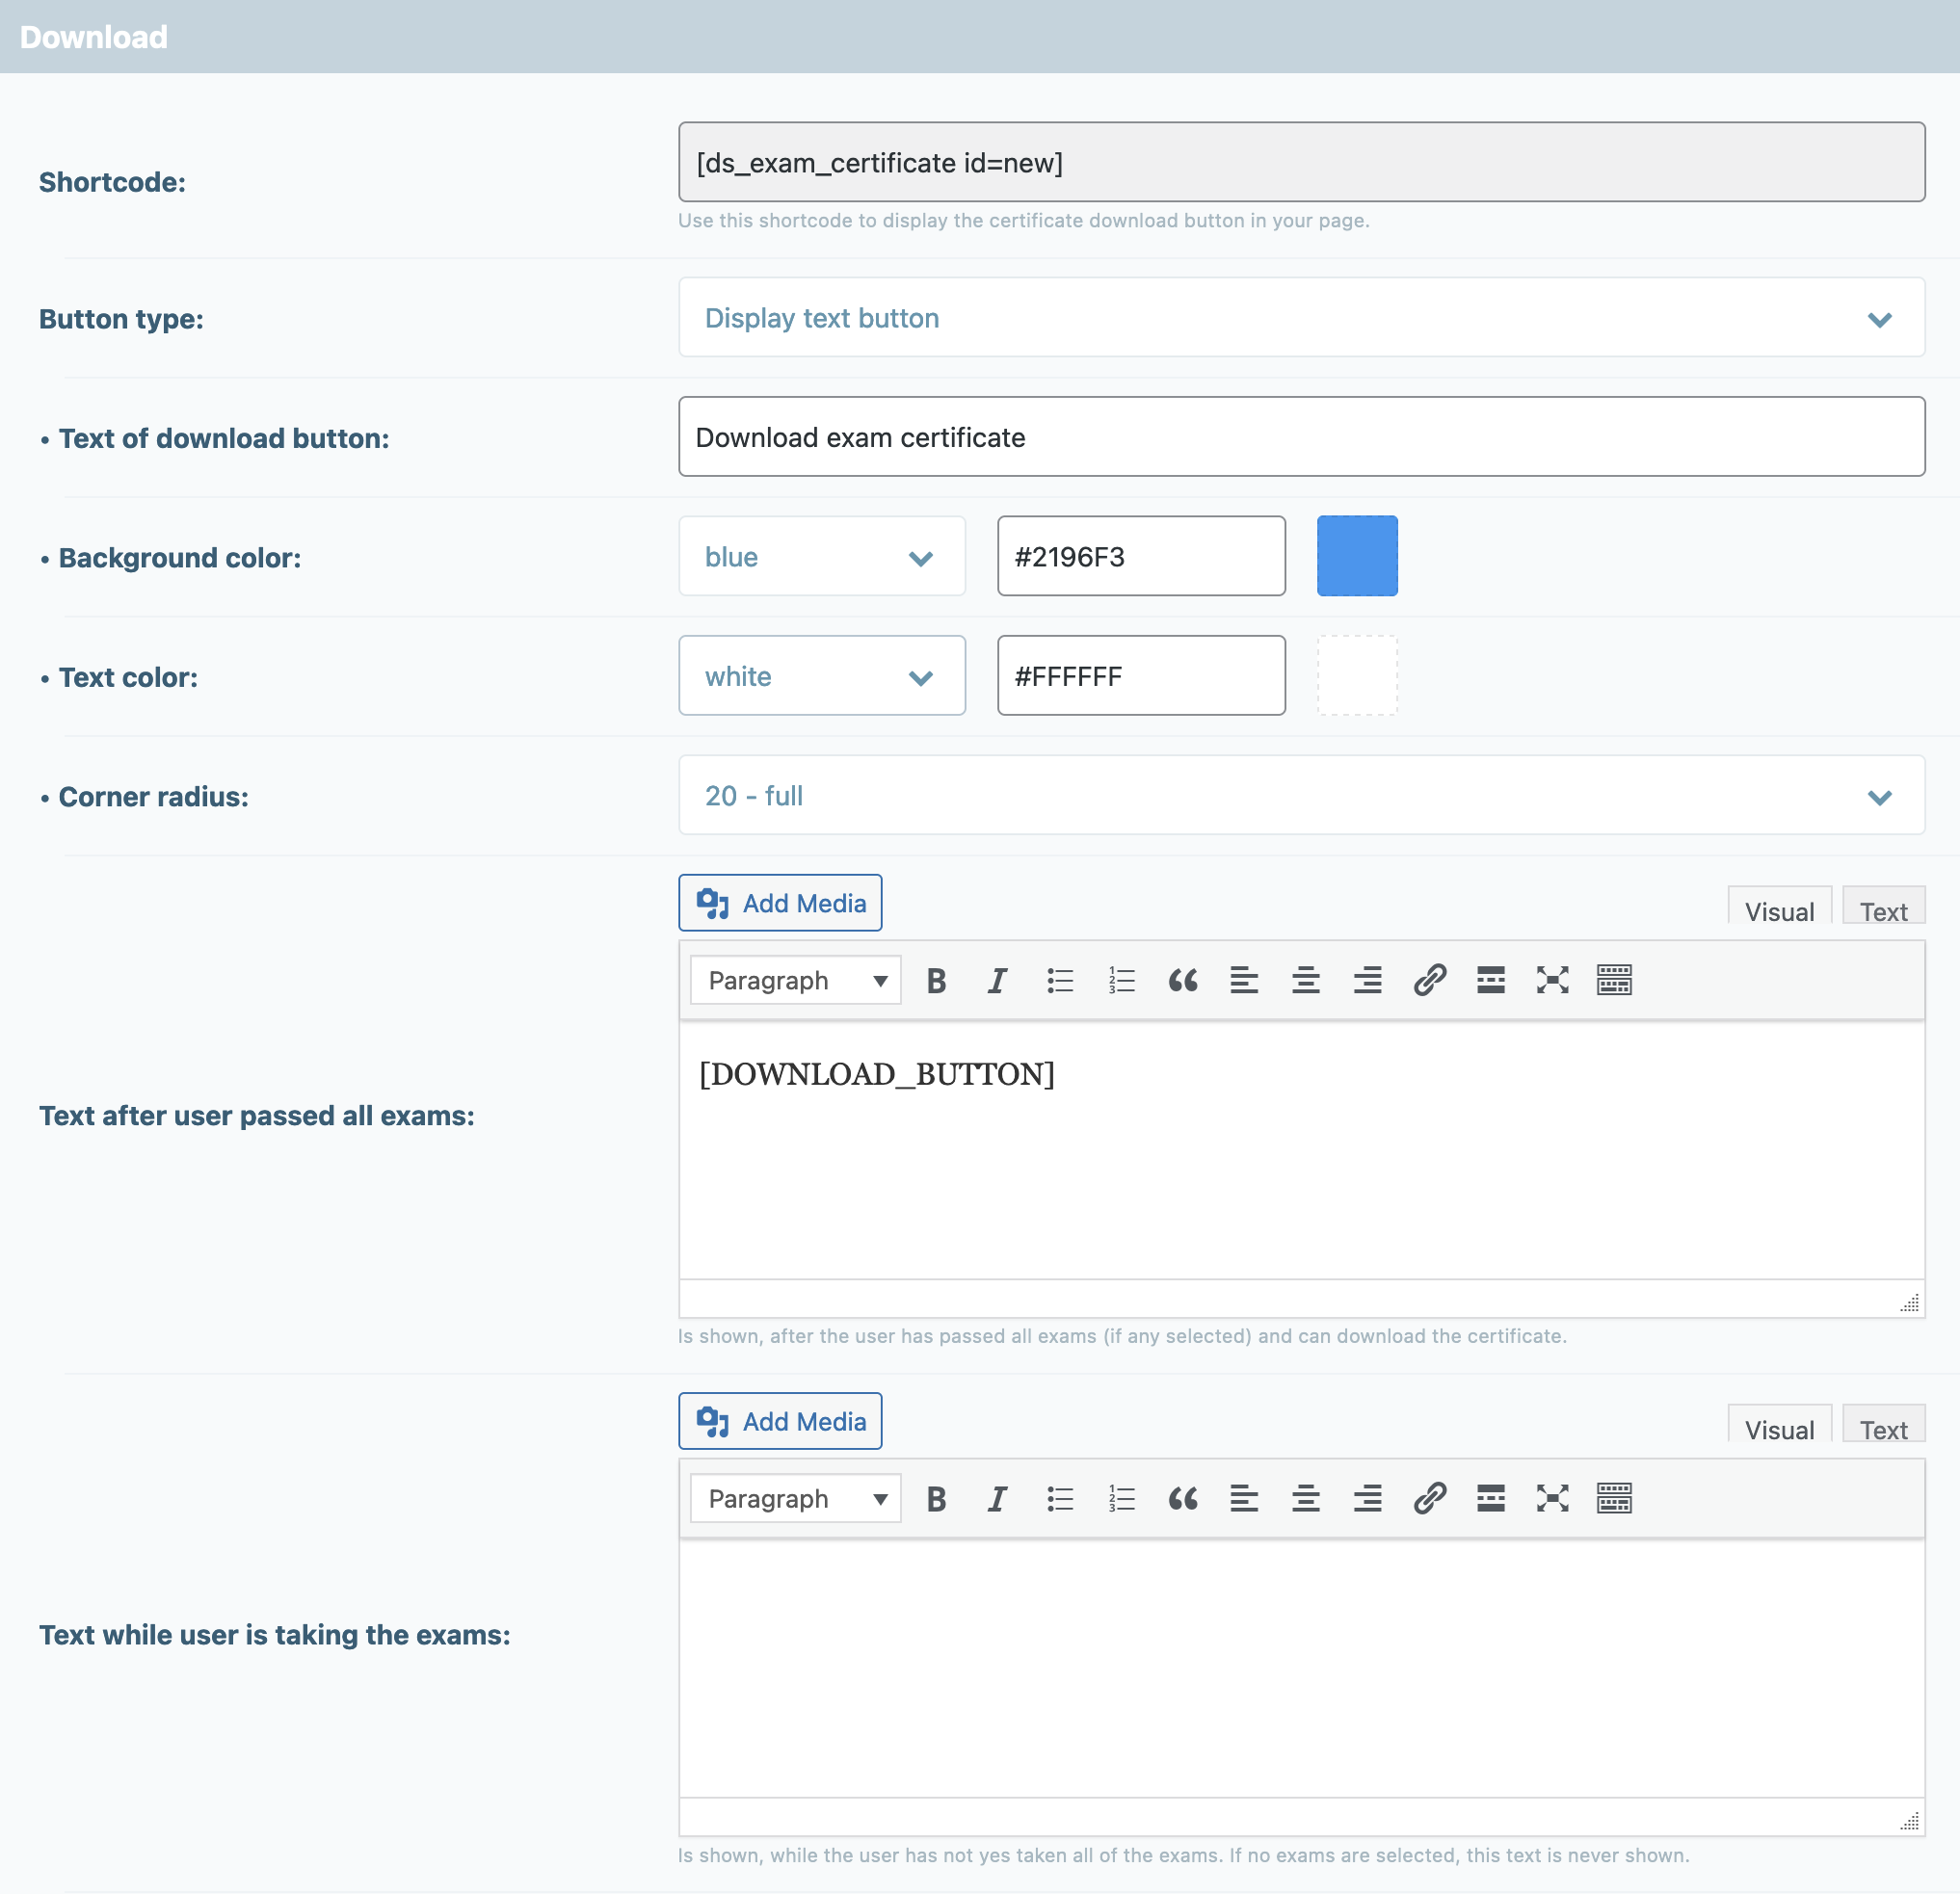
Under Download you can further optimize and individually design the user experience with the certificate.
Use the shortcode (X is automatically replaced by the certificate number) to display the download button for the certificate on your WordPress page.
To download the certificate, choose between text form and a picture template that you can upload yourself.
Next you define the text that should appear when "Pass all exams". This text will appear if the user has passed all exams or if no exams are selected for this certificate.
The "Text until completion of all exams" is displayed until the user has passed all exams for the certificate. If no exams are selected, this text is never displayed.
The text if the user has failed one or more exams is displayed if the user has failed at least one exam. If no exams are selected, this text is never displayed.

The following placeholders are also available for use here:
DOWNLOAD_BUTTON → a button is created, by clicking on it the user can download his certificate
EXAM_LIST → the list of all exams that the user has to pass
PREVIEW_IMAGE → the preview image of the certificate
If the user discovers an error in the spelling of his name and asks for the certificate to be corrected, you can proceed as follows:
Click on "Create certificate" at the very bottom.
A pop-up window will then open where you enter the full name of the user and then click on "ok". A new browser window will then open with the certificate PDF, which you can download and send to the user by e-mail, for example.
