19. Forms
General information about forms
With the DigiMember forms you have the possibility to collect additional information about your customers and to activate DigiMember products for your customers.
The forms can be designed completely freely. Here you can query the DigiMember standard fields or insert the DigiMember user-defined fields into the form and display further information.
Create a new form
In the admin area you will find the item "Forms" in DigiMember. If you have called this, you can create a new form using the "ADD NEW" button.
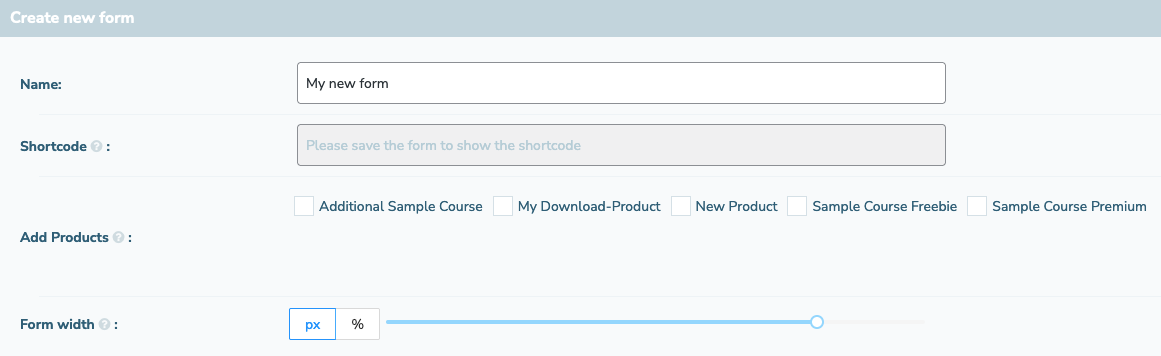
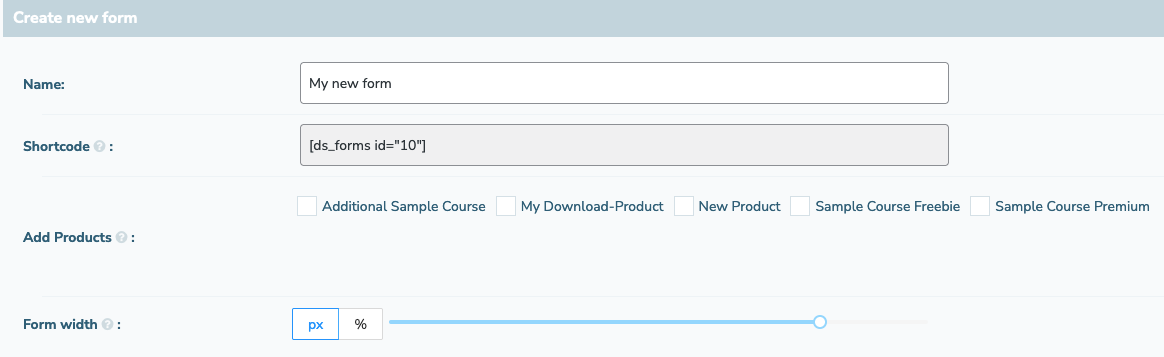
It is first entered as the name for the "New form" form. You can adapt this name according to your wishes. Under the name you will find the shortcode with which you can display your created form anywhere within your WordPress site.
First of all, the field for the shortcode is empty.
Therefore click on "SAVE CHANGES" at the bottom. After saving, the shortcode will be displayed and you can continue to edit the form according to your needs.
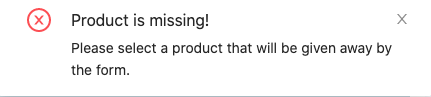
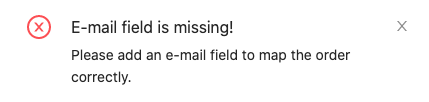
The changes are saved, but the necessary components for the form to work properly are currently missing. In order for a DigiMember form to work, at least 3 components are required:
1. Add DigiMember product
Your products that you have created in DigiMember -> Products are displayed below the shortcode. If no product is displayed there, it is very likely that one has not yet been created. You can then do this in DigiMember -> Products.
So that the product can be activated for the user, activate the check mark in front of the desired product for this form.
2. Mail field
You can find the mail filed at the input elements on the left.
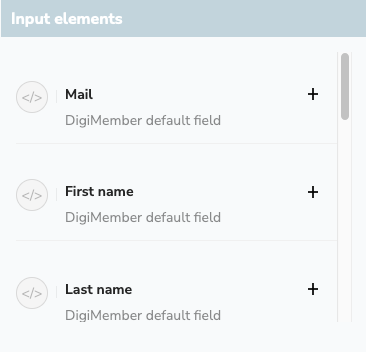
By clicking on the plus sign, the mail field will be added to the right of it in your form. For the registration of the user, at least the specification of the email address is necessary so that the user can be created.
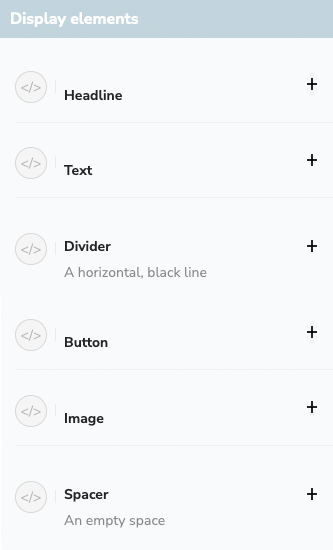
3. Button for submitting the form
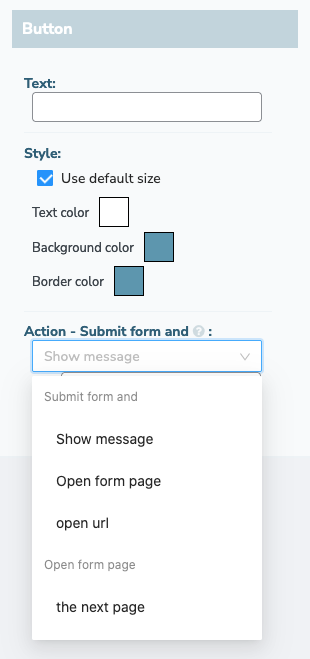
You can insert the button via the display elements by clicking on the plus sign next to it. It then has to be adjusted afterwards so that the form can be sent with it.
You can basically edit elements by clicking on the element. Options will then appear on the right for you to choose. So that the button can be used to send the form, you have to set this accordingly under "Action - Submit form and". The first 3 entries send the form and the selected action is then carried out.
Those were the 3 elements that are required for the form to work. You can add all other elements if necessary in order to design the form according to your wishes and to request further information. If one of the 3 mandatory information is missing, an error message will be displayed when processing the form.