10. Exams
In this video we explain how to create exams and exam certificates and how to combine them.
Summary:
- Log in to your WordPress Dashboard and click on DigiMember -> Examinations
- Click on "Add".
- Give your exam a name and create questions and their possible answers.
- Then click on "Accept change".
- Customize the texts in the tab "Texts" according to your own ideas and then click on "Apply changes".
- In the tab "Settings" you can now set how many percent correct answers are required to pass the exam and how often the exam can be repeated.
- Then click "Apply change" again to save.
- Create a new page and add the exam shortcode to the page.
- Go now to DigiMember -> Exam Certificates and click "Add ".
- Select the design of your certificate and click "Select".
- Give the certificate a name and choose which exam you want to associate with this certificate. Then you can adapt your certificate** and design it individually with text and upload a seal if you want to.
- Then you have to insert the shortcode for the "Download certificate" button on any page where the participant can download the certificate if he or she has passed the exam.
- Done.
In order to check the level of knowledge of your participants after working through lessons and learning modules, you are welcome to access the so-called exams and thus ensure more engagement of your users.
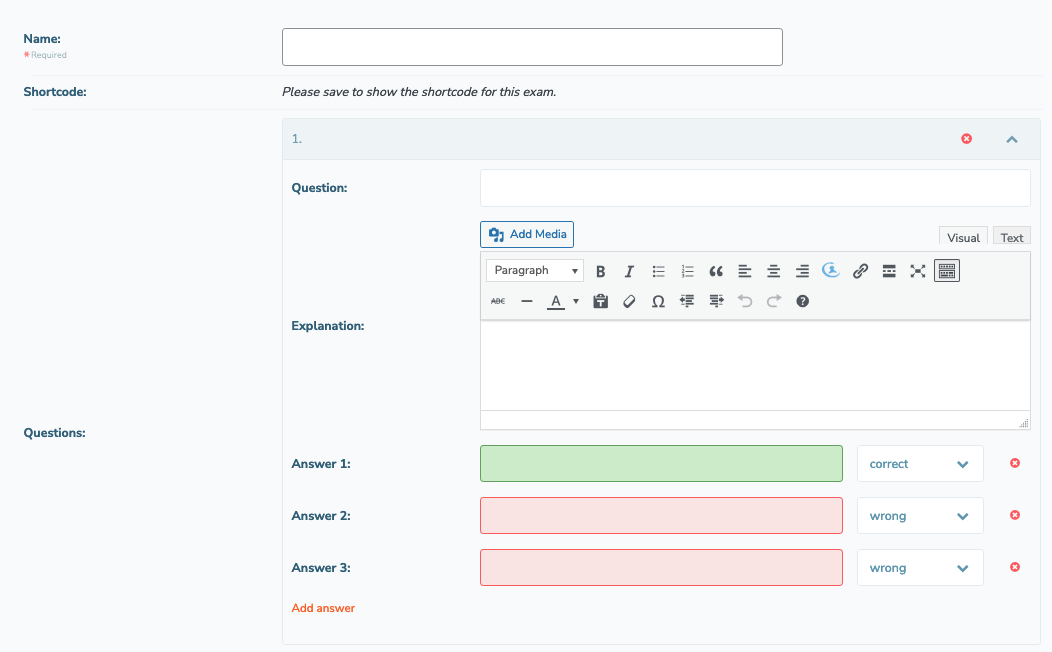
To create a new exam click on "Exams" in the DigiMember menu. Then click on "add" above.

Next, you specify the name of the exam and define the number and type of questions. You can add an explanation or give tips for each question. Then select the number of correct and incorrect answers and save the exam. (click on "'Apply changes")

Under "Texts" you can specify further information and details about the exam. Among other things, you can write an introduction to the exam and go into details that are relevant for the user.
Under "Exam passed" you create the text that the user will see when he has successfully passed the exam.
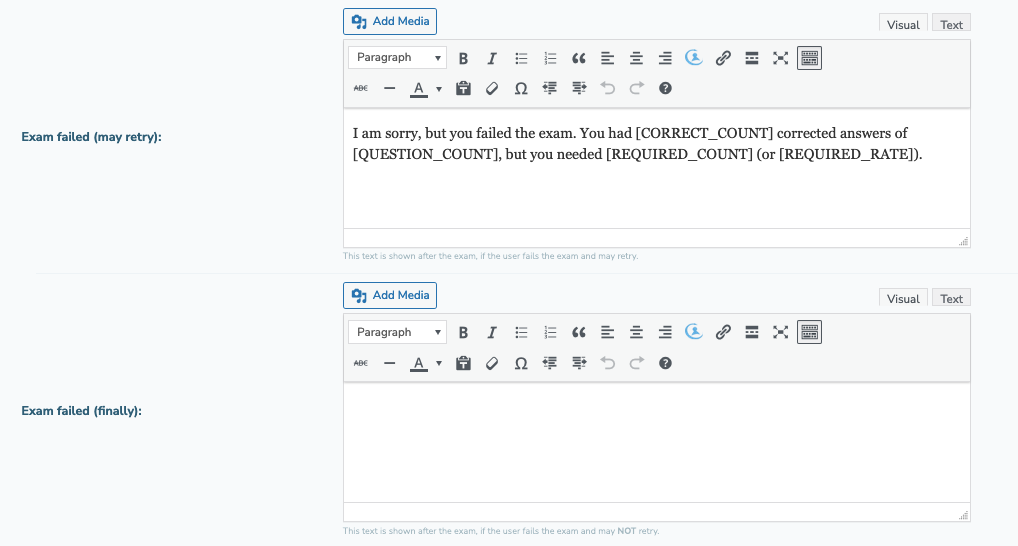
If the user did not answer the questions or did not answer all of them correctly, you can specify under "Failed (may repeat)" which text message the user should see.
If the user has finally failed the exam (you define the number of attempts under "Exam property"), then you define a corresponding text message to the user under "Failed (final)". This text will be displayed after the check if the user does not pass and cannot try again.
To better visualize the exam results, a number of placeholders are available.
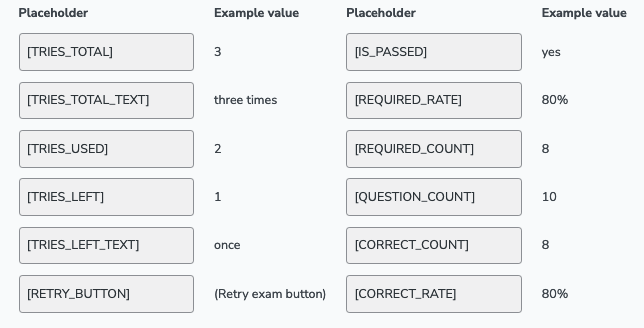
TRIES_TOTAL → shows the total number of attempts the user has to pass a test.
TRIES_TOTAL_TEXT → shows the total number of attempts, expressed in words.
TRIES_USED → the number of attempts already made (so far unsuccessful)
TRIES_LEFT → how many attempts the user still has
TRIES_LEFT_TEXT → how many attempts has the user left (in words)
RETRY_BUTTON → Exam repeat button (User clicks on it and exam questions are reloaded)
IS_PASSED → the system is asked whether the test has been passed and returns the answer "yes" or "no"
REQUIRED_RATE → shows the user the previously defined minimum rate in order to pass the test.
REQUIRED_COUNT → shows how many questions must be answered correctly.
QUESTION_COUNT → shows how many questions there are in total
CORRECT_COUNT → shows how many questions have already been answered correctly
CORRECT_RATE → shows the percentage of questions that have already been answered correctly.
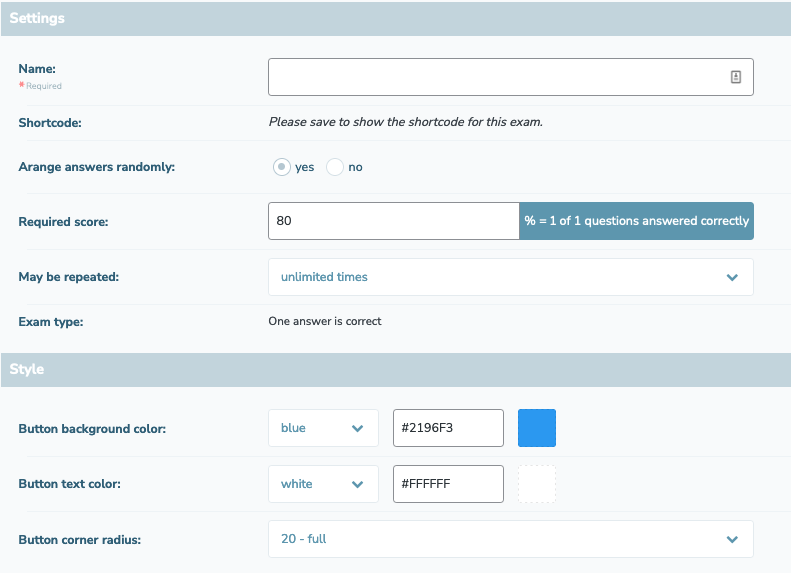
Set exam properties
Here you define the properties of the check. Among other things, you define whether the answers to the exam should appear in a random order and how many questions must be answered at least correctly to pass the exam. You also define whether an exam can be repeated as often as required or whether only a limited number of attempts are available.
Furthermore, the visual appearance of the send button is also defined. Here you define the color, text color and the button borders.