4. Products
This video contains a small tutorial on how to create your first membership product and protect content with it.
Declaration of renunciation/ Waiver right of withdrawl
Before accessing the product (protected member site), the customer will be informed and asked for a clear consent that the right of withdrawal expires with the beginning of the service.
If selected, the buyer can only access paid content if either the cancellation period has expired or the buyer has deliberately waived his right of cancellation.
If he waives and if the order has been processed by Digistore24, Digistore24 shall be notified of the waiver.

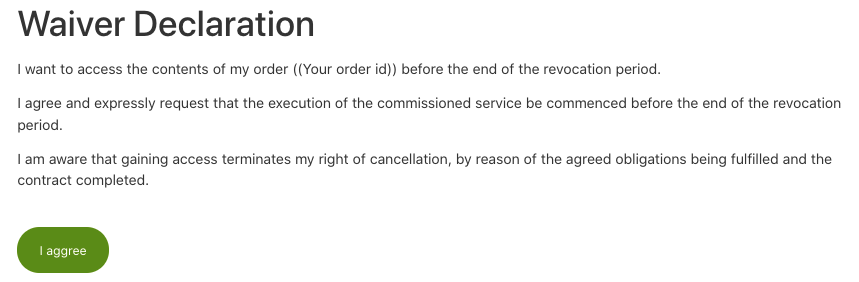
How do I set up a waiver page?
Just create a new page where you add the shortcode ds_waiver_declaration and save the page.
Important: Make sure that this page is NOT protected.
And this is what the waiver on the page will look like:
Members Products
In DigiMember you can create member products. You can then assign protected content (pages & articles) to these products, to which only authorized users have access. Products can be free of charge for the user.
If you want to offer different product variants (Levels), name the products e.g. Bronze, Silver, Gold etc.
If you have more than one product, DigiMember automatically recognizes for which product a user has access. That means you can use one login form for your whole membership and you *DON't have to create a separate login form for each product.
Example:
You have created 2 products, Product A and Product B. If someone buys Product A and then logs in, only the contents of Product A are accessible. If the user calls up a page that belongs to Product B, for example, he cannot see this content. Which page DigiMember displays in this case can be set in the product settings.
If the user who previously purchased Product A now also purchases Product B, DigiMember will recognize this. The user has access to both products from this point on. Only one login form is necessary!
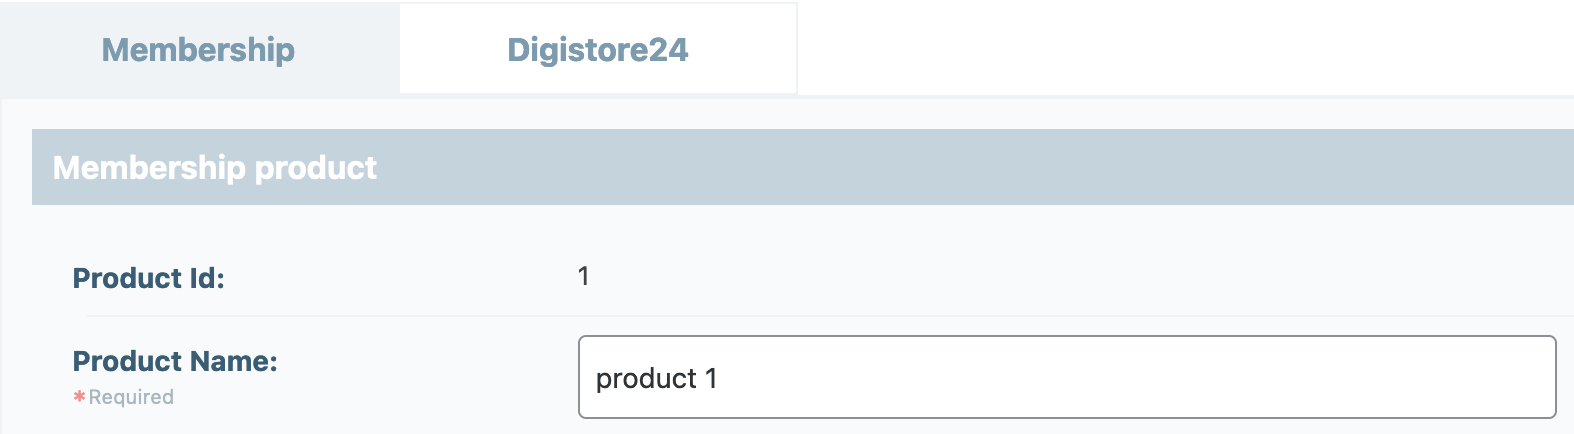
To create a product click on "Products " in the DigiMember menu and then, at the top of the page, click on "+ New Member Product ".

Product ID
DigiMember automatically creates a Product ID when you create a new product. This ID is assigned exclusively by DigiMember and cannot be changed. The Product ID's are assigned numerically, sequentially.
A possible case where you need the Product ID is e.g. when integrating external payment providers (not always necessary, depending on the payment provider).
Product name
You can give your products a name (required). To do this, enter the corresponding product name in the field, you can choose the name freely.

If you do not enter a name, DigiMember will give the product the name "New Product ". You can change the product names at any time.
page after the first login
In the product settings you can select the "page after the first login " (drop-down menu). Here you select the page from your WordPress pages that a new user (e.g. customer) should access after logging into your member area for the first time (e.g. Welcome to the member area 1).
This setting serves to enable you to greet your new members separately, especially after the first login, or to give them information that is not necessary every time they log in. You can also make this setting analogous to the setting "Page for all further logins ".
Page for all further logins
In the product settings you can select the "Page for all further logins " (drop-down menu). Here you select the page from your WordPress pages that a user (e.g. customer) should access after logging into your member area (e.g. welcome to the member area).
If you want to direct your members to a page other than this one when they log in for the first time, please set this in the setting "Page after first login ". This page will then only be displayed after the first login, after which the setting of "Page after first login " will apply to all further logins.
Link for products Shortcode
If you want to show your members an overview of the products with a direct link to the start page of the respective product, select the respective start page of the product from the drop-down menu "Link for products shortcode ".

If you do not make a separate selection here, the setting "Page for all further logins " is used.
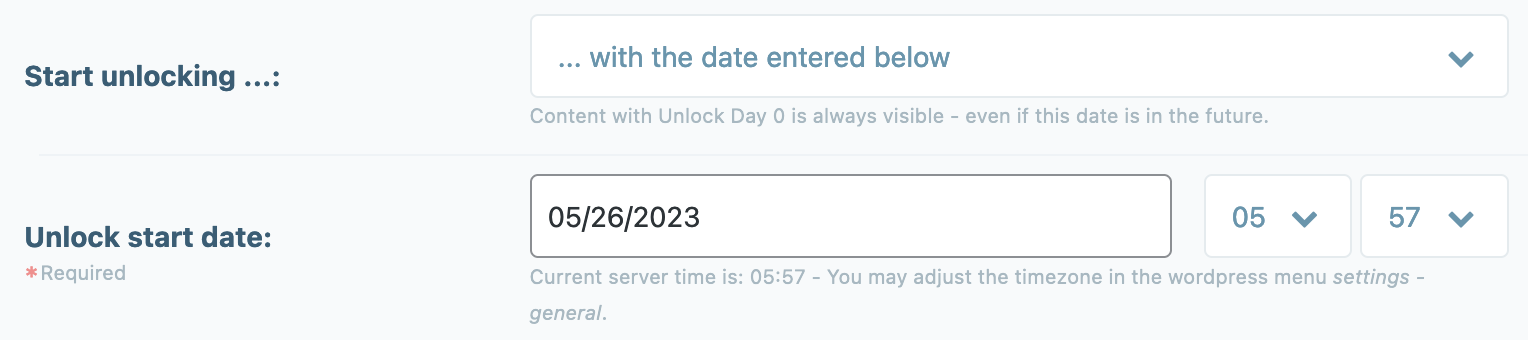
Start the activation
For example, if you want to unlock a video course step by step, you can define this in the content list. Click here to learn more.
The option Start the unlocking controls when the time periods set there apply. You have 2 options:
- with the order date
- with the date below
Example for Option 1:
Page 1 activation after: 0
page 2 activation after: 3
page 3 activation after: 7

Order on 10.10.2030
Page 1 available: 10.10.2030
Page 2 available: 13.10.2030
Page 3 available: 17.10.2030
With Option 2 you enter a fixed date from which the activation takes place. The principle is then the same as above, except that the fixed date is used as the starting point instead of the order date.
Exclude contents
This option can be used if, for example, you want to offer a subscription model with constantly new content. For example, if you publish a new article every week, but do not want your customers to have access to the articles before the time of their order, this option is useful.
There are 3 options to choose from for the time:
- none
- contents published before the 1st day of purchase
- contents published before the 1st of the month of purchase
Select Option 1 to leave the function off. The other two represent the relative time before which content is to be excluded.
Important: The time of publication of the content in WordPress applies. Content that is edited later will not suddenly be available to all customers who bought after publication.

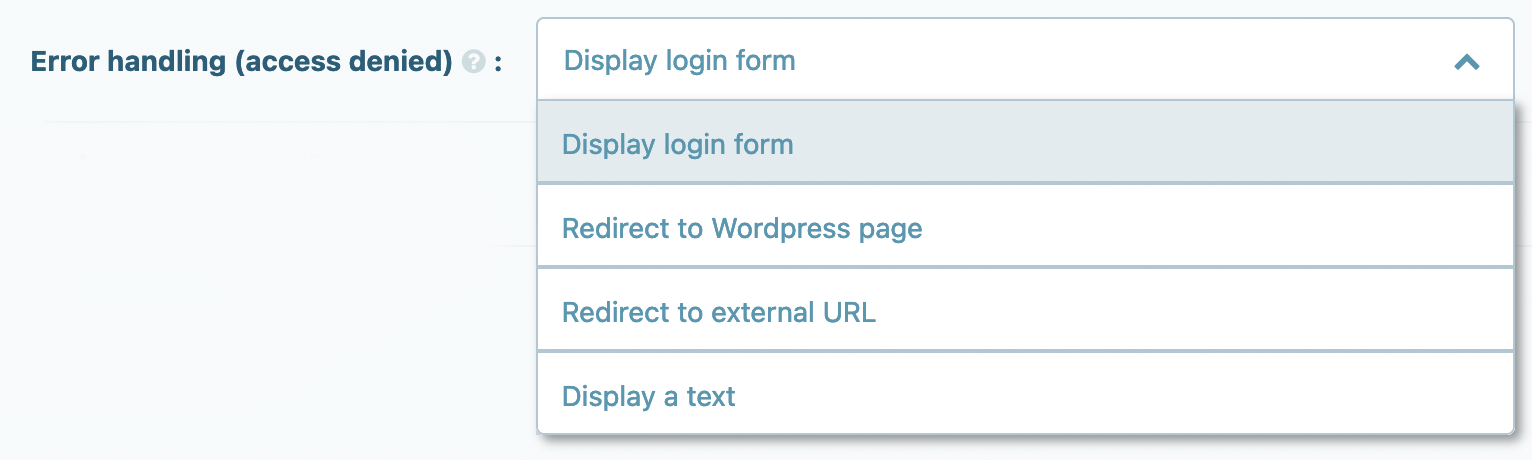
Error handling
With Error Handling, you can set what should happen when someone calls up a DigiMember-protected page (or article) to which they have no access.
The default is "Show login form ". But you can also redirect to another page of your WordPress installation or to an external URL. Alternatively, you can also display a text, which you can enter manually during the setting.
Lock WordPress account
If you have a paid membership or subscription and a payment is not made or is reversed, DigiMember will receive notification of this from most payment providers. DigiMember will then automatically block access to the respective product, but not the respective WordPress account.
With the setting "Block WordPress account in case of non-payment " you can set whether the user's WordPress account should be blocked immediately in addition to the product access. The default setting for this case is: No (this means that the WordPress account is not locked. The user can then continue to log in, but without having access to the product).
In the drop down menu you can set this to "Yes,... " and choose a variant of how DigiMember should react in this case.

This is important in the following case, for example:
Suppose you run a forum on your WordPress page parallel to DigiMember, which requires a WordPress user account to write there, but no access to one of your products. If you set the option "Block WordPress account in case of non-payment " to "Yes,... ", the user will no longer be able to write in your forum.
Menu settings
In the settings of the respective product, you can set how a corresponding menu should behave for the user.

Here are 3 options available (multiple selection possible):
In menu, if not logged in
If the checkbox is activated, visitors of your site who are not logged in will see the menu items of the respective product. If they click on one of the menu items, the setting of your error handling for the product takes effect.
In the menu, if not purchased
If the checkbox is activated, visitors of your site will see the menu items of the respective product if you 1.) are logged in but 2.) have not bought the product (e.g. if you have several products). If you click on one of the menu items, your error handling settings for the product will take effect.
In the menu, if not yet activated
If the checkbox is activated, visitors of your site will see the menu items if they 1.) are logged in, 2.) have bought the product, 3.) the page (article) is not yet activated (in case of sequential activation).
Access duration (days)
The access period determines the days for which a member has access to this product. Simply enter the number of days in the field.

For example:
You offer a product with a one-time payment, for which your member should then receive 30 days access. After the 30 days, the access to the product will be blocked for the customer. For another 30 days of access he must purchase the product again.
Important: For subscriptions leave this field empty! DigiMember automatically blocks access to the product if a subscription payment has not been made.
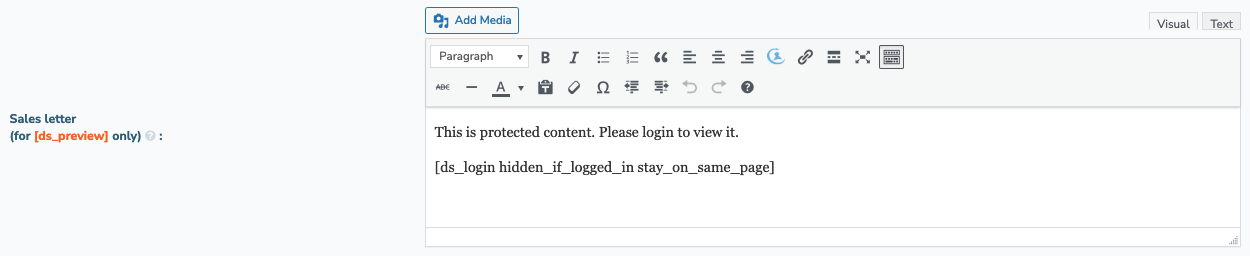
Sales text (Preview)
You can also protect individual sections of pages and articles with DigiMember. To do so, use the shortcode at the respective place on the page or article.
The text entered in the field will then appear instead of the shortcode.
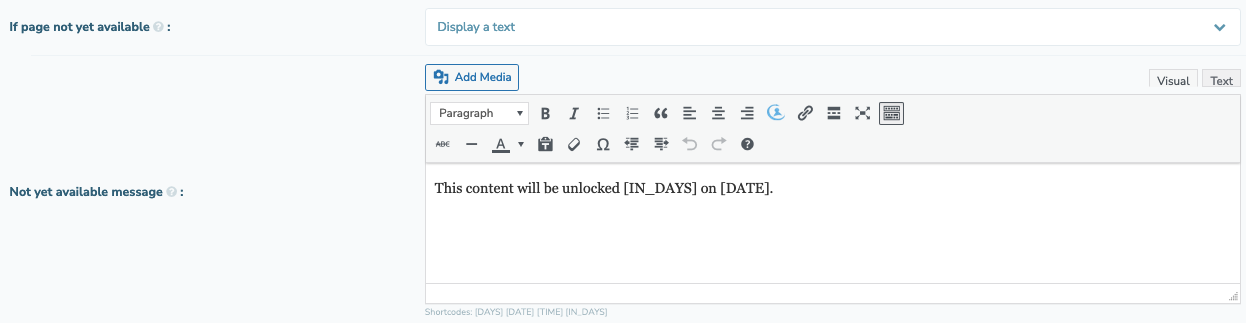
If this page is not yet available
With this option you can influence the behaviour of DigiMember, if the delayed activation is activated and the content the customer wants to access is not yet activated for him. You have 3 options to choose from:
- forward to a WordPress page
- redirect to URL
- display a text
With Option 3 you can define your own text that will be displayed to your customer. You have 2 placeholders available for this purpose, which you can use to inform the customer:
[IN_DAYS]--> Displays the number of days remaining until activation[DATE]--> Shows the date of activation
Important: These placeholders are individual for each customer. The placeholders do not have to be used together.
Download Products
Summary
- If you want to create a download product, you must create a page for your product first. Add text, an image of your product and the shortcode for a download product to the page. Then publish the page.
- Log in to your WordPress Dashboard and click on DigiMember -> Products
- There you click on "New Download Product "
- Then you have to give your product a name and specify the download page in WordPress.
- Then you can set the access duration and the download limit of the file. Meaning how long the buyer has access to the product after the purchase and how often he may download it after the purchase.
- At "Protect content " you can set which page and information users should see when they land on the download page but have not purchased the product or are not logged in.
- Done.
With DigiMember you can deliver your download files.
To create a download product, click on "Products " in the DigiMember menu and then, at the top of the page, click on "+ New Download Product ".

Then assign your product name and enter the corresponding information on the product in the following window:
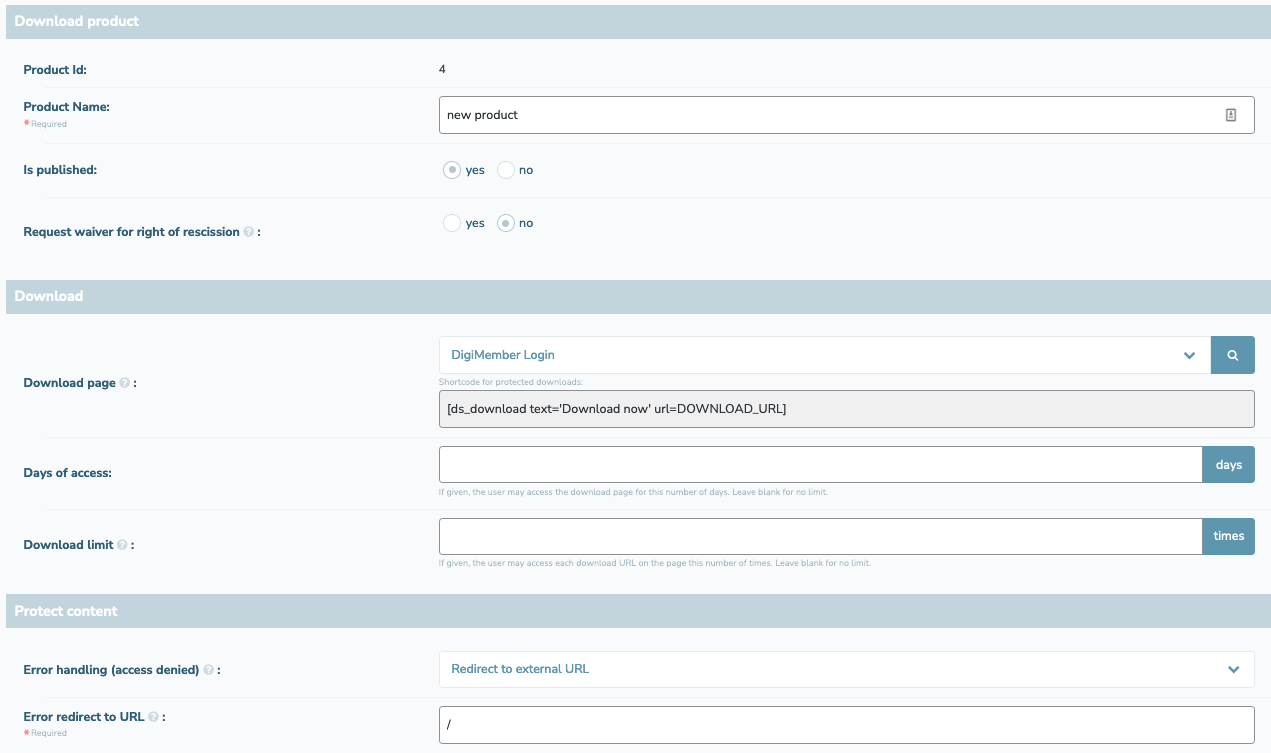
The "Published" setting determines whether the product is available or not. If you plan to offer your product later, set "no", if you want to offer it immediately, set "yes".
Select the download page from a drop down menu (you must have created the page before). On the download page, include the download link (explanation further down in the text).
With the access duration you determine how long someone can access the download page after they have bought the product. For example, enter 3 if you want to allow your customers to access the download page for 3 days after purchase.
The download limit indicates the total number of downloads allowed. Similar to the duration you can limit your downloads. For example, enter 3 if you want to allow your customers to download the product 3 times.
For error handling, select the page or enter an external page in the field below to which someone should be redirected if they are not authorized to download the product or if one of the limits (duration or number) has already expired.
After you have made these settings click on "Apply changes ".
Download page
On your specified download page you can now insert the corresponding download URLs with the DigiMember Shortcode Generator.
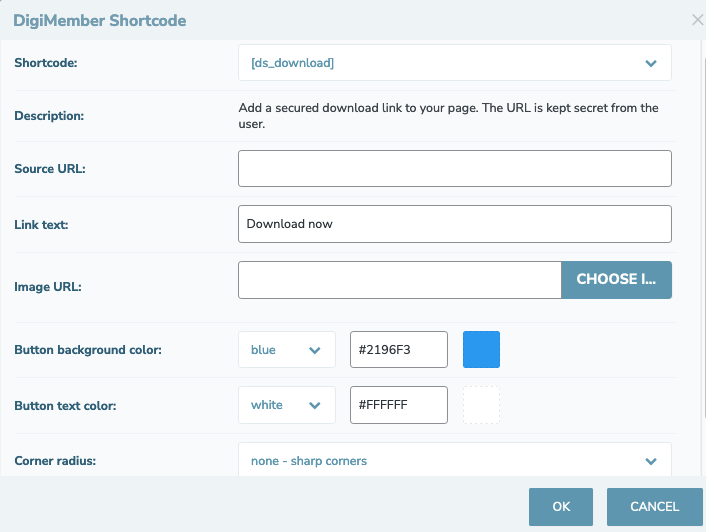
Select the ds_download shortcode. In the File URL field, enter the URL where you saved your download file (Web Account, Dropbox, Amazon S3 etc.). For the link text you can enter any text that will appear on the download page. Alternatively, you can also insert a graphic (e.g. Download Button). Click "Ok"!
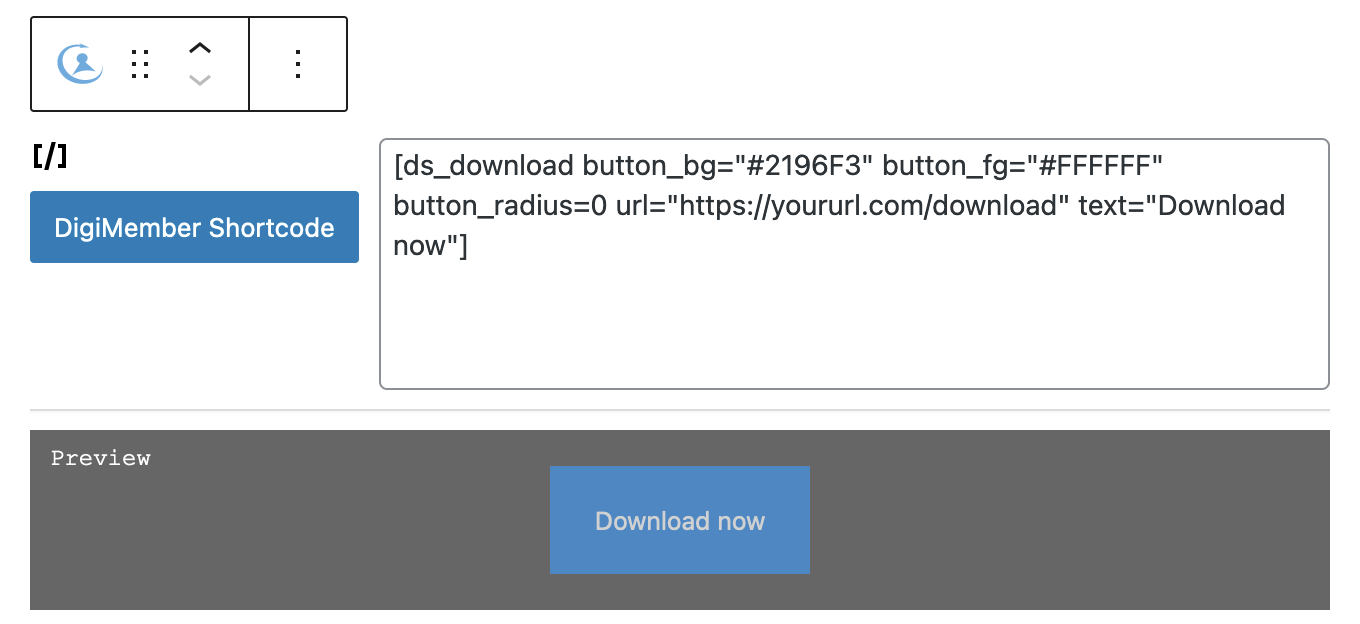
In the WordPress Editor you will now see the shortcode with your download URL.
DigiStore24 (product generator)
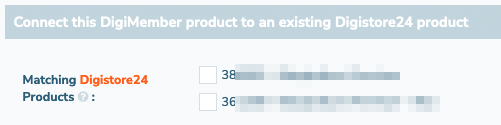
You can create your product directly from DigiMember at DigiStore24. This will then be synchronized. ATTENTION: To use this function you must connect your DigiMember account to DigiStore24 ([click here for more information](/docs/reference-book/rb-settings#connect to-digistore24)).
Click on "Products " in the DigiMember menu and move the mouse over the respective product. Then click on "DigiStore24"

Alternatively, you can select the tab "DigiStore24" at the top of the selected product.
If DigiMember is connected to DigiStore24, you will see the following window:
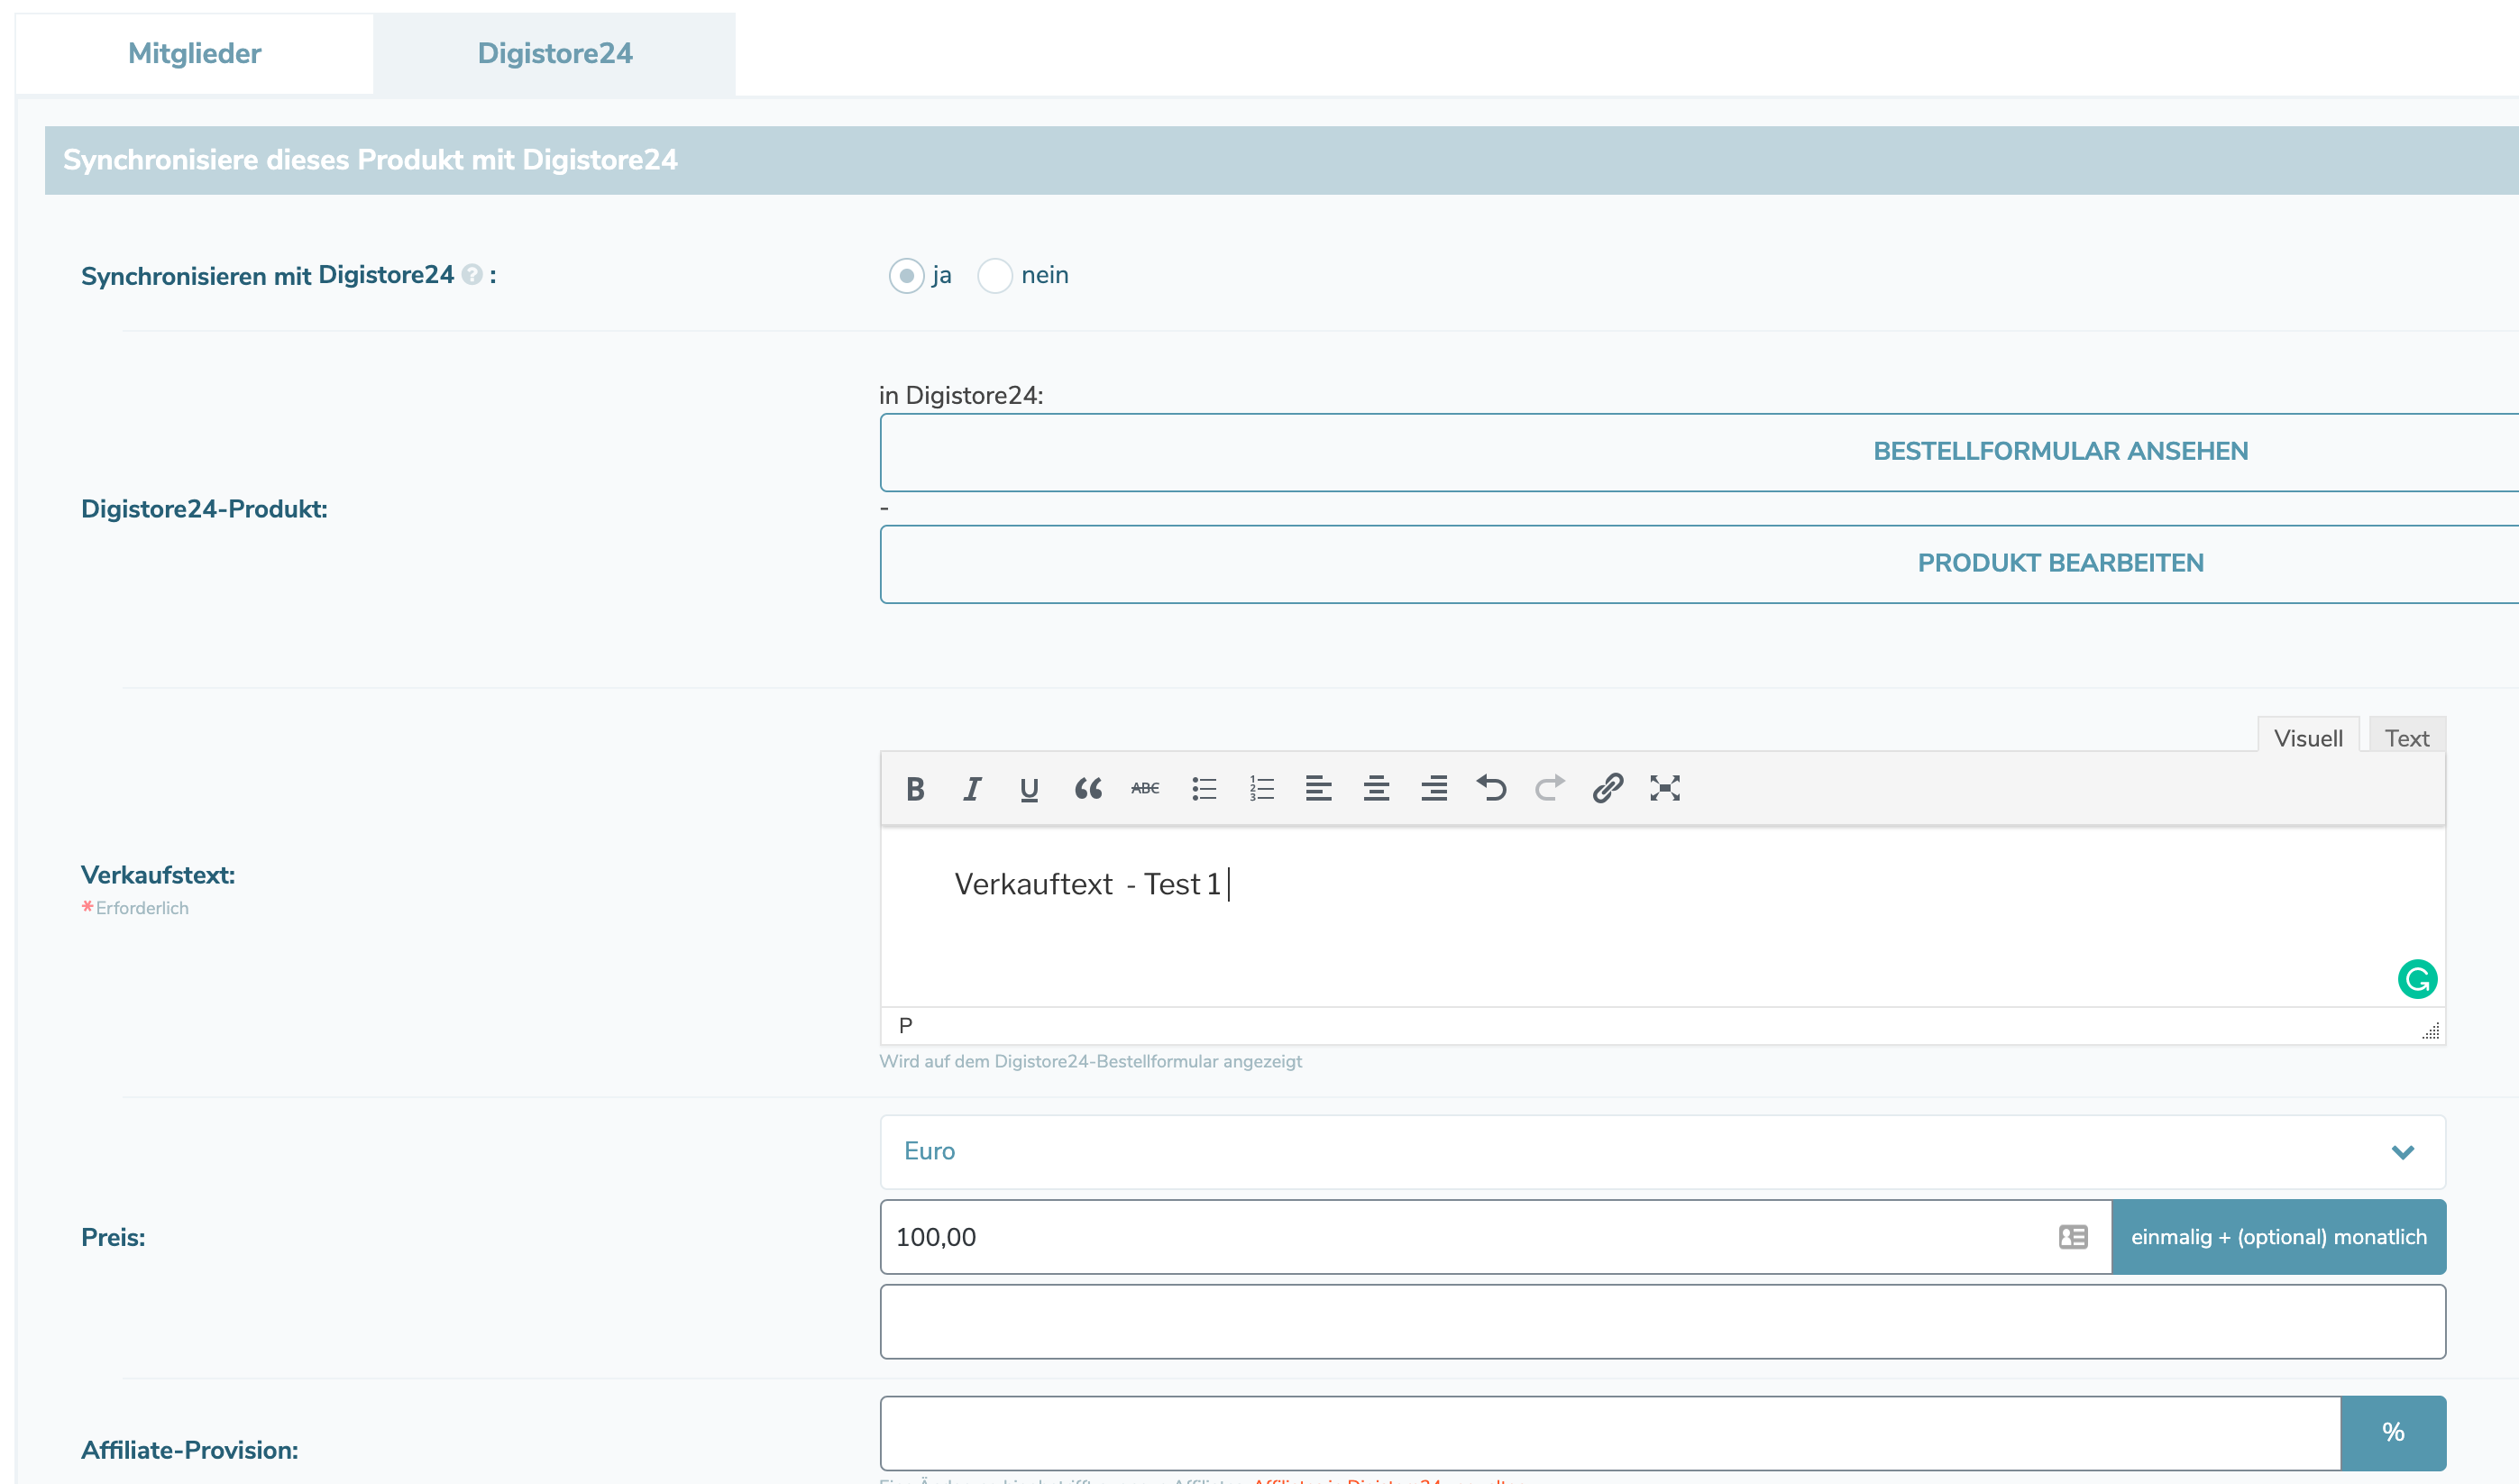
If not already checked, set the checkbox "Synchronize with DigiStore24" to "yes"!
Enter your sales text that should appear on the order form (you will receive the link to the order form after you have saved).
Set the price. You can create one-time payments and/or monthly payments in DigiMember. If you want to set a different payment rhythm, please do this directly at DigiStore24 after that).
Now enter the affiliate commission, if you want to pay out a commission for affiliate sales. If you do not want to offer an affiliate commission, leave the field empty.
Now select your sell page and your thank you page URL (both are required for product approval). You can enter an external URL or select a page from your WordPress installation.
Upload image & submit product for approval
To upload a product image, please make sure that your graphic is not larger than allowed (2 MB) and that the dimensions of the image are exactly 100 pixels wide and 100 to 500 pixels high. You can submit your product for approval directly from DigiMember. Only do this when you have provided all the necessary information (sales page, thank you page, price etc.)
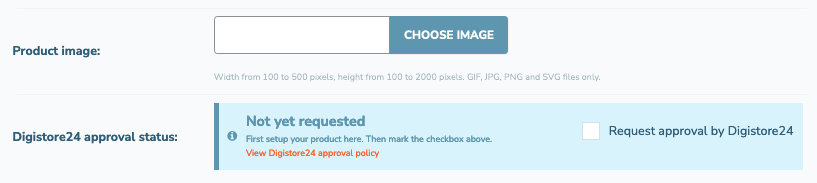
After saving (apply changes) you will see the link to your order form and your new product checked at the bottom of the list.

You can edit the product afterwards at any time, in DigiMember or directly at DigiStore24.