6. Payment Provider
Interfaces to third party providers
DigiMember is NO payment provider! In order to deliver your paid memberships automatically, you have the possibility to connect DigiMember to external payment providers. For this purpose, appropriate interfaces are available for integration.
DigiMember has interfaces to the following payment providers:
- DigiStore24 (direct connection possible - recommended!)
- PayPal
- ShareIt
- AffiliCon
- Clickbank
- Cleverbridge
- 2CheckOut
In addition, it is possible to add further payment providers generically if the corresponding prerequisites are met by the payment provider (e.g. server to server notification). Please note that this is only an option for advanced users, usually programming skills are required. We do NOT offer support for the generic connection.
Add payment provider
To add a payment provider click on "Payment provider " in the DigiMember menu. Then click on the link "Add payment provider ". ATTENTION: This step is not necessary if you connect DigiMember to DigiStore24!

Now select a payment provider from the drop-down menu.
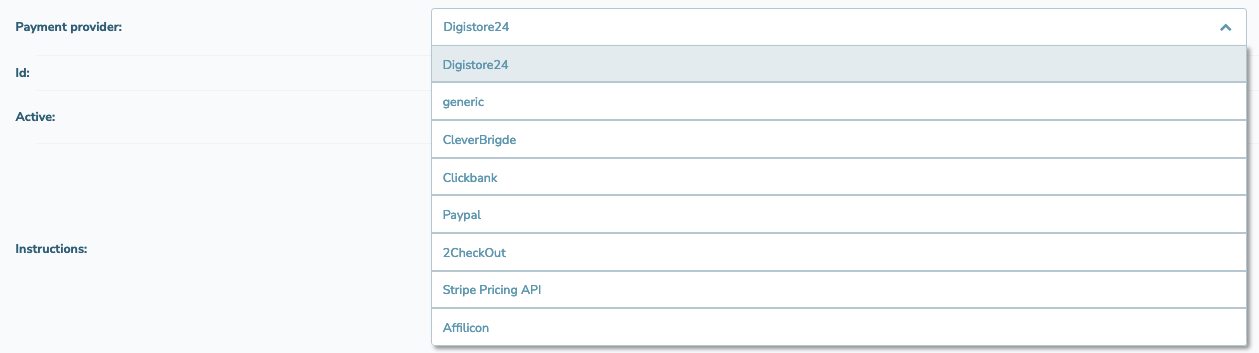
After you have selected a payment provider, instructions on how to proceed appear directly on the page.
DigiStore24 (direct connection)
To use the direct connection with DigiStore24 do NOT click on "Add" but on the link "Connect to Digistore24 now"!

You will then be directed to the Digistore24 website. If you don't have an account yet you can create one HERE. If you already have a Digistore24 account, you have to enter your access data and click on Login.
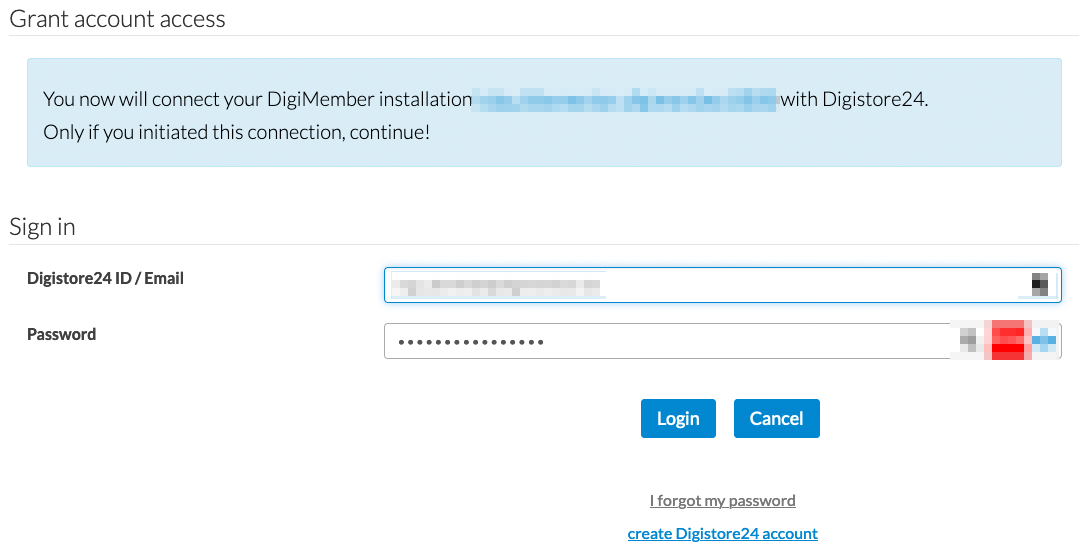
Afterwards you will return to your WordPress Dashboard, to the paymen providers and see that DigiMember is now connected to Digistore24.

Adding Stripe as a payment provider
From DigiMember version 3.000.161 it is now also possible in the German version of DigiMember to use Stripe directly as a payment provider and not only via Zapier or the generic connection! The connection is quite simple and can be set up using step-by-step instructions.
- Go to payment provider in your DigiMember plugin and click on the "ADD" button at the top right.
- Select "Stripe Pricing API" from the list and click the "APPLY CHANGES" button below to create the notification URL.
- Copy the notification URL to your clipboard.
- Log into Stripe (if you don't already have a Stripe account, you'll need to create and activate one first).
- Click Developer in the top right, then click Webhooks in the menu on the left. Then click on the "+ Add endpoint" button in the top right corner to create a new endpoint.
- In the "Endpoint URL" field, paste the notification URL that is on your clipboard
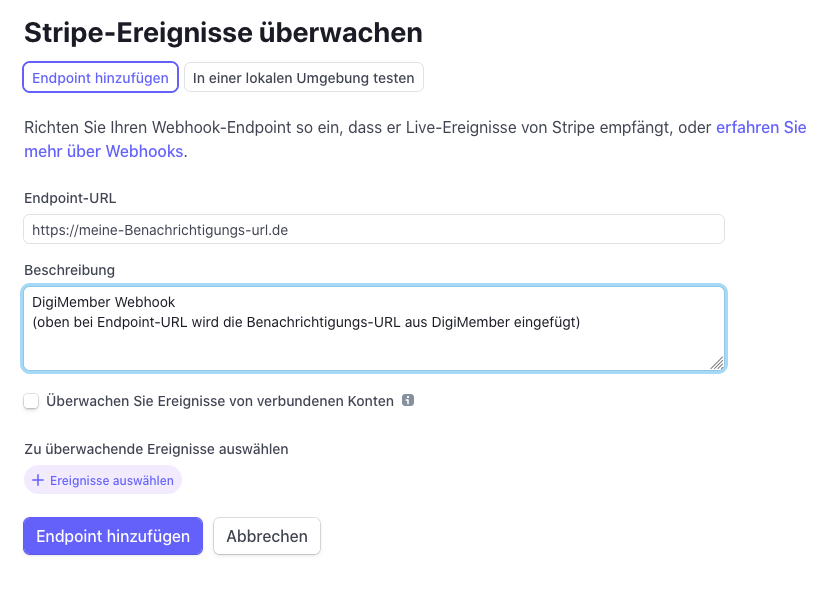
Click on the "+ Select Events" button below
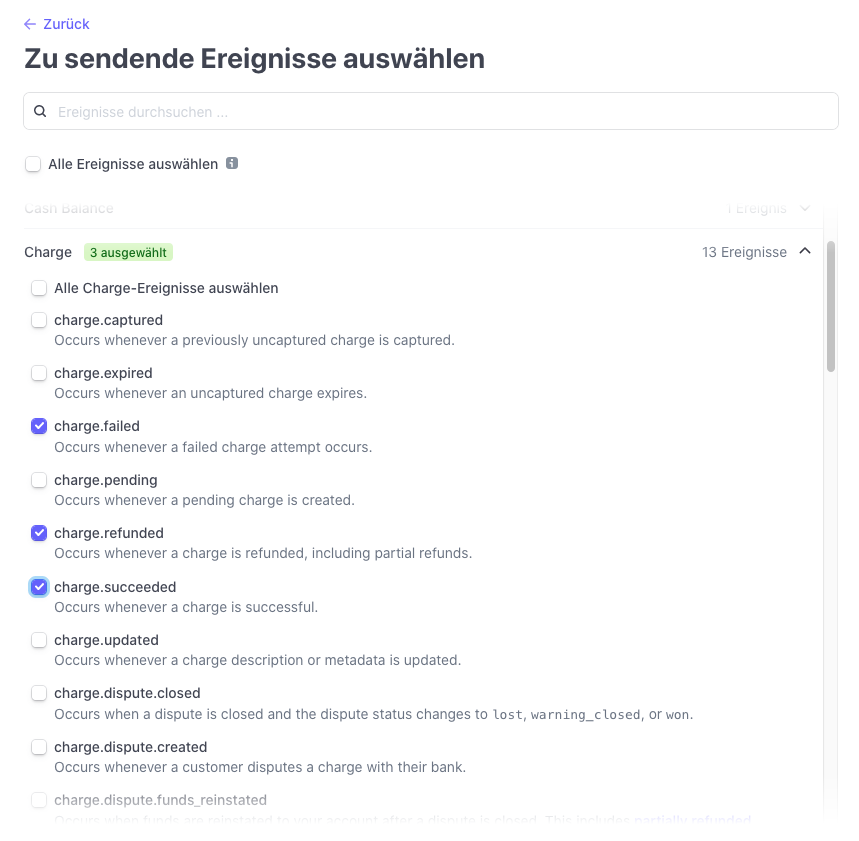
Open the "Charge" tab and select the following 3 events:
- charge.failed
- charge.refunded
- charge.succeeded and then click on the "Add Events" button below
- Save the webhook by clicking on the "Add endpoint" button below.
- The created webhook will be displayed. Click on "API Keys" in the menu on the left
- Display the secret key by clicking on "Show test key" and copy the displayed key.
- Paste the copied public key into DigiMember in the "Stripe Secret Key" field and click "APPLY CHANGES"
- All products that you have created in DigiMember -> Products are now displayed. To the right are the products created in Stripe, which you can activate with a tick. This links the DigiMember products to the associated Stripe products.
Please note that the secret key in Stripe for the test mode is different than for the active module. It is therefore necessary to create different connections for the test and for the live operation of Stripe.